Getting Started with Matterport: A Step-by-Step Guide for New Users
Posted by Oliver Murray, Philip Hanrahan B.E., B. A., M.I.E.I. on 25th Jan 2024
In the realm of digital space representation, Matterport stands as a pioneering platform, transforming how we perceive and interact with physical spaces in the virtual world. This innovative technology has rapidly gained traction across various industries, from real estate and architecture to travel and education, offering an immersive, 3D virtual experience that's both engaging and informative.
What is Matterport?
At its core, Matterport is a cutting-edge spatial data company that specialises in 3D capture and virtual tour technology. Utilising high-definition cameras and sophisticated software, Matterport enables users to create detailed, interactive 3D models of physical spaces. These models, or 'digital twins,' provide a realistic representation, allowing users to explore and evaluate spaces remotely with ease.
The Impact of Matterport
The advent of Matterport technology has been a game-changer, particularly in the real estate sector. It empowers realtors to showcase properties in stunning detail, offering potential buyers a virtual walk-through experience that's as close to reality as it gets. This not only saves time but also broadens the market reach, attracting a global audience. Similarly, in architecture and interior design, Matterport aids in visualising and planning spaces more effectively, enhancing collaboration and decision-making processes.
Benefits of Using Matterport
The benefits of using Matterport are manifold. It offers an unparalleled level of immersion and interaction, making it a powerful tool for marketing and showcasing properties. For professionals, it streamlines workflows, improves communication with clients, and provides a competitive edge in a rapidly evolving digital landscape. For the general user, it offers an exciting and accessible way to explore spaces they might not physically visit, from historical landmarks to luxury real estate.
Matterport is not just a technological innovation; it's a new way of experiencing and interacting with the world around us. As we delve deeper into this guide, we'll explore how you can leverage Matterport's capabilities, whether you're a professional looking to enhance your business or an enthusiast eager to explore the possibilities of 3D space capture.
Understanding the Basics of Matterport
Matterport is more than just a tool; it's a comprehensive ecosystem designed to bring physical spaces into the digital realm with stunning accuracy and detail. At its heart, Matterport is about creating digital twins of real-world environments, offering a 3D representation that's both interactive and immersive.
Core Features of Matterport
The platform's primary feature is its ability to create 3D scans of physical spaces. These scans are compiled into a cohesive, navigable model using Matterport's proprietary software. The result is a detailed, 360-degree view of the space, allowing users to 'walk through' virtually, examining every corner and feature as if they were physically present.
Functionality and Versatility
Matterport's functionality extends beyond mere visual representation. The platform allows for the addition of tags and annotations within the 3D space, enabling users to highlight key features or provide additional information. This makes it an invaluable tool for education, training, and presentations, where detailed explanations or guided tours are necessary.
Industries Benefiting from Matterport
While real estate and architecture are the most prominent sectors utilising Matterport, its versatility has seen its adoption in numerous other fields. Retail spaces use it for store layout planning and virtual showcases. Museums and galleries leverage it to create virtual tours, making art and history accessible worldwide. In the hospitality industry, hotels and resorts use Matterport to offer virtual previews of their accommodations, enhancing customer engagement and booking rates.
The Matterport Advantage
The advantage of using Matterport lies in its ability to bridge the gap between physical and digital experiences. It provides a level of detail and interactivity that traditional photographs or video tours cannot match. For businesses, this means more engaging marketing materials and a better understanding of spaces for planning and development. For individuals, it offers an accessible way to explore and interact with spaces they might never visit in person.
Matterport is a versatile, powerful tool that has revolutionised how we interact with and understand physical spaces.
Equipment and Tools Required
To harness the full potential of Matterport, having the right equipment is crucial. Here's a breakdown of the essential gear you'll need to start your Matterport journey:
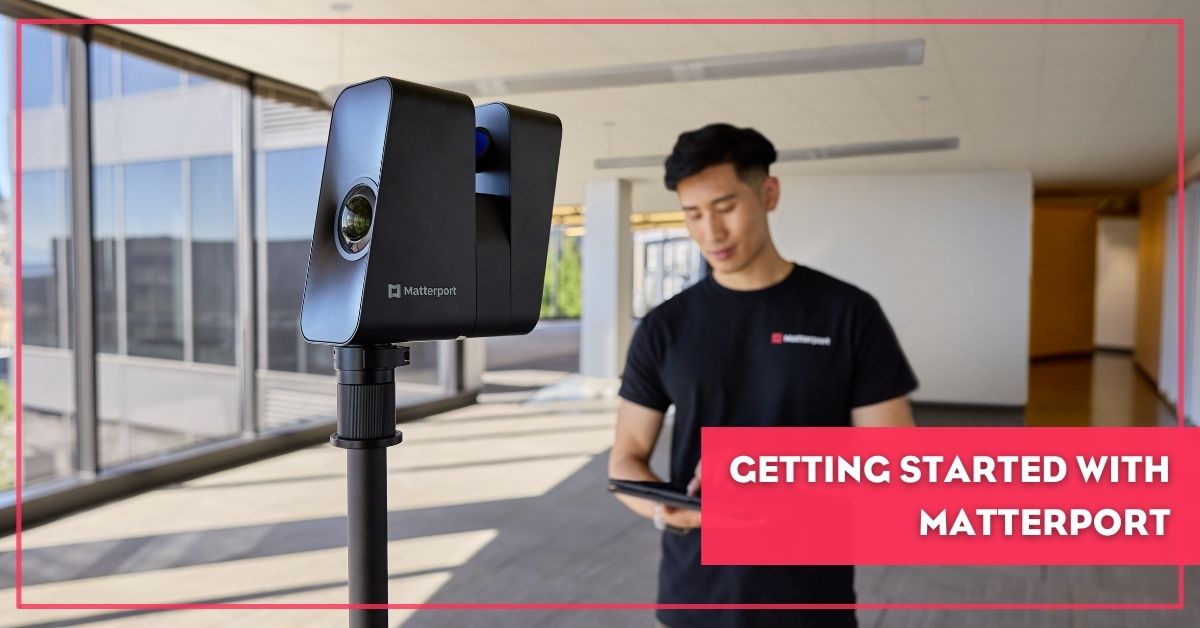
1. Matterport-Compatible Camera
- Primary Option: Matterport Pro3 3D LiDAR Camera, designed specifically for Matterport scans, offering high-quality 3D imagery and precision.
- Alternative Options: For those on a budget or seeking portability, Matterport supports various 360-degree cameras and even smartphones with compatible apps.
- Considerations: Choose a camera based on your specific needs—quality of scans, ease of use, and budget. Need help choosing? Get in touch with us to schedule a consultation.
2. Tripod
- Stability is Key: A sturdy tripod is essential for ensuring stable and clear scans.
- Compatibility: Ensure the tripod is compatible with your chosen camera, especially in terms of mounting and weight support.
3. Additional Accessories
- Tripod Dolly: While not strictly necessary, we always recommend getting one. They make moving from one scanning spot to another significantly faster and easier.
- Battery Packs: Extended battery life is crucial for larger spaces.
- Memory Cards: Adequate storage for high-resolution images.
- Carrying Case: For protection and easy transport of your equipment.
4. Software and Apps
- Matterport Capture App: Essential for controlling the camera and capturing the scans.
- Editing Software: While Matterport’s platform offers basic editing tools, additional software can be useful for advanced editing.
5. Reliable Internet Connection
- Upload and Processing: A stable internet connection is vital for uploading scans to the Matterport cloud for processing.
Investing in the Right Tools
Investing in the right equipment is a critical step in your Matterport journey. While the initial cost might be significant, especially for high-end cameras like the Matterport Pro3, the investment pays off in the quality and efficiency of your 3D models. For beginners or those with budget constraints, starting with a compatible smartphone or a more affordable 360-degree camera is a viable option. As you grow in your Matterport usage, you can always upgrade your equipment to match your evolving needs. With the right tools in hand, you're now ready to capture your first space.
Capturing Your First Space with Matterport
Capturing a space with Matterport is an exciting process that combines technology with creativity. Here's a step-by-step guide to ensure your first Matterport scan is a success:
1. Preparing the Space
- Tidy Up: Ensure the space is clean and decluttered. Remove unnecessary items that might distract from the main features.
- Plan Your Route: Strategize the path you'll take during the scan. It should be logical and cover all areas efficiently.
- Optimal Lighting: Good lighting is crucial. Open curtains to let in natural light and turn on all interior lights.
2. Setting Up Your Equipment
- Assemble Your Camera and Tripod: Set up your Matterport-compatible camera on the tripod, ensuring it's stable and at the right height.
- Check Camera Settings: Ensure your camera is fully charged, has sufficient memory, and is set to the correct settings for Matterport scanning.
3. Starting the Scan
- Begin at a Focal Point: Start your scan in a central location or a key area of the space.
- Slow and Steady: Move the camera to different points, allowing it to capture each area fully. The process should be slow and methodical to ensure high-quality scans.
- Cover All Angles: Make sure to capture the space from various angles and positions. This includes corners and unique features of the space.
4. Completing the Scan
- Final Checks: Once you've covered the entire space, do a final walk-through to ensure no areas have been missed.
- Upload and Process: Upload your scans to the Matterport cloud for processing. This may take some time depending on the size of the space and the quality of your scans.
5. Review and Edit
- Initial Review: Once processed, review your 3D model in the Matterport dashboard.
- Make Adjustments: Use Matterport’s editing tools to make any necessary adjustments, such as aligning scans or adding labels.
Capturing your first space with Matterport is a learning experience. Don't worry if it's not perfect. Each scan will improve your skills and understanding of the process. With practice, you'll be able to create stunning, immersive 3D models of any space.
Processing and Editing Your Scans
After capturing your space with Matterport, the next step is processing and editing your scans to create a seamless and engaging 3D model. Here's how to refine your scans into professional-quality virtual spaces:
1. Uploading and Processing Scans
- Upload to Matterport Cloud: Transfer your scans from the camera to the Matterport cloud platform. This process can vary in time, depending on the size and number of scans.
- Automatic Processing: Matterport's software automatically stitches the scans together, creating a cohesive 3D model. This process may take a few hours to a day, depending on the complexity of the space.
2. Basic Editing Features
- Trimming and Aligning: Use Matterport's tools to trim excess areas and align different scans for a more accurate representation of the space.
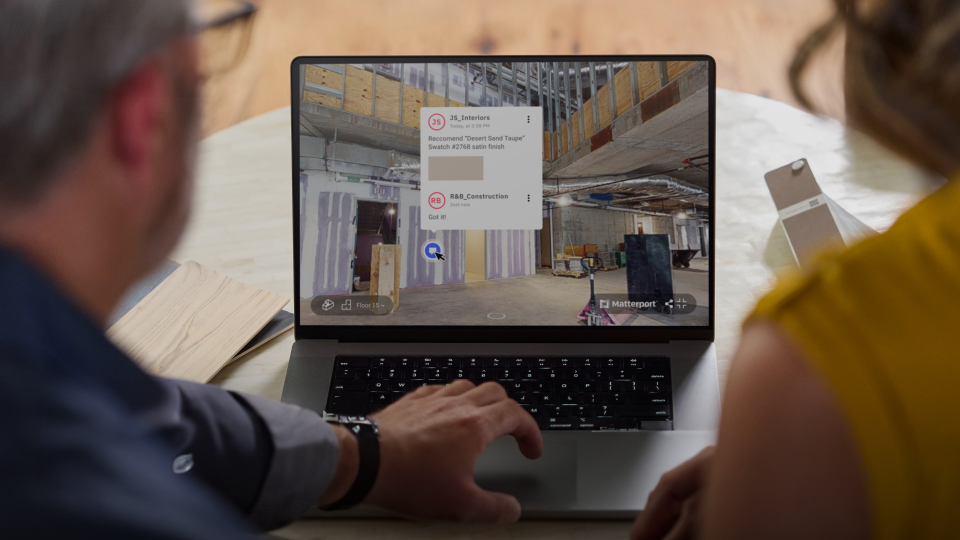
- Adding Labels: Insert labels and descriptions to highlight key features or provide additional information about specific areas in the model.
3. Enhancing Your Scans
- Adjusting Brightness and Contrast: Fine-tune the lighting of your scans to ensure the space looks inviting and clear.
- Repairing Errors: Look for and correct any errors or misalignments in the model. Matterport provides tools to fix common issues like misshapen objects or stitching errors.
4. Final Touches
- Adding Mattertags: Enhance the interactivity of your model by adding Mattertags – interactive hotspots that can include text, links, or multimedia content.
- Creating Highlight Reels: Design a guided tour through the space by creating a highlight reel. This feature allows you to set a predefined path for viewers to follow, showcasing the best features of the space.
Processing and editing your Matterport scans is a crucial step in creating a high-quality virtual experience. With these tools, you can transform raw scans into polished, interactive 3D models that accurately represent the physical space. As you become more familiar with these features, your ability to create engaging and detailed virtual tours will continually improve.
Creating Virtual Tours and Showcases
Once your scans are processed and edited, the next exciting phase is creating virtual tours and showcases. This allows you to present your space in an interactive and immersive manner. Here’s how to create captivating virtual tours using Matterport:
1. Planning Your Tour
- Define the Tour Path: Decide on the route that the virtual tour will take through the space. It should flow logically and highlight the key features of the space.
- Identify Key Areas: Determine which areas or features you want to emphasise in your tour. These could be unique architectural elements, room layouts, or any special features.
2. Using Matterport’s Tour Creation Tools
- Set Starting Point: Choose an inviting and representative starting point for your tour. This is the first view users will see when they start the virtual tour.
- Create a Walkthrough Path: Utilise Matterport’s tools to create a smooth and intuitive path through the space. This guides viewers as they navigate the tour.
3. Adding Multimedia Elements
- Incorporate Mattertags: Enhance the tour by adding Mattertags at strategic points. These can include text descriptions, links to websites, or even video clips providing more information about specific areas or features.
- Utilise Multimedia: For a more engaging experience, consider adding background music, voiceovers, or video clips that complement the visual tour.
4. Sharing and Embedding Your Tour
- Easy Sharing: Matterport provides options to share your virtual tour through a simple link, making it easy to distribute via email, social media, or on websites.
- Embedding Options: Embed your virtual tour on your website or blog for easy access, providing an immersive experience directly within your site.
Creating virtual tours and showcases with Matterport is not just about presenting a space; it’s about telling its story and engaging viewers in a unique and interactive way. With these tools, you can transform any space into a captivating virtual experience, opening up new possibilities for showcasing properties, facilities, and more.
Advanced Features and Tips
As you become more comfortable with Matterport, exploring its advanced features can significantly enhance your virtual models. Here are some advanced tips and features to elevate your Matterport experience:
1. Utilising Advanced Editing Capabilities
- Floor Plan Creation: Matterport allows you to generate accurate floor plans from your scans, a valuable feature for architects, real estate agents, and interior designers.
- Dollhouse View: This unique 3D overview provides a comprehensive view of the entire space, offering a different perspective that is both informative and visually appealing.
2. Integrating with Other Software
- Virtual Reality (VR) Compatibility: Matterport models can be converted into VR experiences, offering an even more immersive way to explore spaces.
- Software Integration: Integrate your Matterport models with other software platforms for enhanced functionality, such as building management systems or design software.
3. Advanced Scanning Techniques
- Outdoor Scanning: While Matterport is primarily used indoors, with the right conditions and techniques, it can also be effectively used for outdoor spaces.
- Large Space Scanning: Learn techniques for efficiently scanning large or complex spaces, ensuring complete coverage and high-quality results.
4. Professional Tips for Quality Scans
- Consistent Lighting: Ensure consistent lighting throughout the space to avoid discrepancies in the final model. We recommend having an additional source of light (i.e. LED torch) in your kit.
- Overlap in Scanning: Overlapping scans slightly can lead to better stitching and a more cohesive model.
- Regular Firmware and Software Updates: Keep your camera and Matterport software updated for the best performance and access to new features.
Exploring these advanced features and tips will not only improve the quality of your Matterport models but also expand the range of projects you can undertake. As you grow in expertise, Matterport becomes an even more powerful tool in your arsenal, offering endless possibilities for creative and professional use.
Troubleshooting Common Issues
Even with the most advanced technology, encountering issues is a natural part of the learning process. Here are some common challenges faced by Matterport users and how to address them:
1. Poor Image Quality
- Cause: Often due to inadequate lighting or camera settings.
- Solution: Increase natural or artificial lighting and check camera settings for optimal image capture.
2. Misaligned Scans
- Cause: Usually occurs when the camera is moved too quickly or the space has many similar-looking areas.
- Solution: Rescan the area more slowly and methodically, ensuring distinct features are captured in each scan.
3. Processing Errors
- Cause: Can happen due to large file sizes or internet connectivity issues.
- Solution: Ensure a stable internet connection and consider scanning in smaller sections if the space is large.
4. Software Glitches
- Cause: Occasional software bugs or compatibility issues.
- Solution: Regularly update the Matterport app and firmware of your camera. If issues persist, contact Matterport support for assistance.
Encountering and overcoming these challenges is part of the Matterport journey. With each problem solved, your proficiency in using this innovative technology grows, allowing you to create more accurate and immersive 3D models.
Conclusion and Next Steps
As we conclude, you're now equipped with the fundamental knowledge to start your journey with Matterport. From setting up your account to creating immersive virtual tours, each step opens a new world of possibilities in digital space representation.
Continuing Your Matterport Journey
- Experiment and Explore: Practice makes perfect. Continue experimenting with different spaces and features to refine your skills.
- Join the Community: Engage with the Matterport community for tips, inspiration, and support.
- Stay Updated: Keep abreast of the latest Matterport updates and features to enhance your experience.
Your Matterport adventure has just begun. Embrace the learning curve, unleash your creativity, and transform the way you interact with physical spaces in the digital world. Happy scanning
Discover the full potential of Matterport for your projects by exploring the range of equipment and expert advice available at Hitechniques, your partner in bringing spaces to digital life.